- in Have Fun by Alexis Rodrigo
- |
- 2 comments
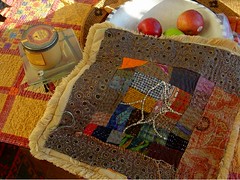
How to Make Easy Patchwork Pillows
I love the look of patchwork, but find quilting to be too daunting. Patchwork pillows are a great way to start learning how to create patchwork, and some of the basic skills required for quilting. It’s also a great way to use up fabric scraps.
Patchwork pillows add lots of charm to rooms. They can spruce up a nondescript couch in short order, and they are absolutely adorable on beds. And best of all, you don’t have to be a seasoned quilting pro to make them. Since they’re small, there is less room for error.
To make a patchwork pillow, you’ll need at least two different but co-ordinating patterns of fabric. The fabric should be of similar weight and texture. It’s possible to make two vastly different fabrics work, but if you have never done patchwork before, it’s much easier to stick with similar ones.
You’ll also need some nice, strong thread. If the thread you use is too thin, it is likely to break. But don’t go for the thickest variety you can find, either. If you do, the finished product won’t look right. Your best bet is somewhere in between those two extremes.
Before you get started, you’ll need to plan what you want your pillow to look like. An easy pattern for beginners is the nine-patch. This simply consists of three rows of three blocks each. For a 12-inch square pillow, you would need four 4-inch squares of one fabric and five 4-inch squares of the other. Measure carefully, and be sure to use sharp, sturdy scissors or – even better – a rotary cutter for a clean cut.
Once you’ve cut out all of your squares, it’s time to start sewing. Start with one square of each pattern. Place the right sides together, and sew the squares together along one edge with a 1/4-inch seam. Then get another square of the fabric you cut five pieces of, and sew it to the other edge of the contrasting fabric in the same manner. When you’re done, you’ll have a row of squares in an A-B-A pattern.
Create another row just like the first one. Then do another row with the pattern reversed (B-A-B). Then place the last row you created on top of one of the others, right sides together. Sew along the length with a 1/4-inch seam. Place the remaining row on top of the B-A-B row with the right sides together, and sew the same way. When complete, you’ll have a checkerboard pattern.
You can use one of the fabrics used in the patchwork to make the backing, or use a co-ordinating solid fabric. Cut a piece the same size as the patchwork, and place the pieces with the right sides together. Sew a seam all the way around, leaving an opening 2 or 3 inches wide. Now all you have to do is turn the pillow right side out, stuff the pillow with fiberfill and sew up the opening.
Patchwork pillows are fun and easy to make. They also make wonderful and inexpensive gifts. They’re great practice for those who would eventually like to try quilting, as well. So don’t be afraid. Give it a try!

You’ll find more easy patchwork projects in Patchwork Style: 35 Simple Projects for a Cozy and Colorful Life (Make Good: Crafts + Life).
If you liked this post, submit your email address below to get new posts by email: